CLICK HERE FOR FREE BLOGGER TEMPLATES, LINK BUTTONS AND MORE! »

Saturday, January 28, 2012

Final Bird Block!!

Well, here is my last block, exciting but sad too.  I will miss these monthly blocks.  Hope we are soon working on another project!
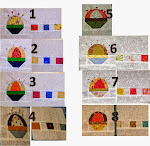
This is the final block.  I see the chickadees are hard to see in the photo, but they show up better on the real block.  Everything is needle-turn appliqued and machine embroidered.
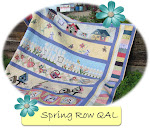
I couldn't get a good, full shot of the last two blocks joined.  They were just too wide to get the whole thing without making the photo too small to see the detail, so I have a shot from the middle.  The full quilt is below.


Sorry, a chair is in front of the bottom left corner, but it is just a continuation of the bottom center, so you aren't missing anything.  I have the fabric and a plan for the border and hope to get that done before long.  Will post it then.  It has been such fun working on this and getting acquainted with all of you guest quilters.  What a wonderful experience!

Tuesday, January 24, 2012

Block #15, and complete setting.

Final Block!!

This block took a lot longer to put together than it looks. The pine tree print had 4 inch wolfs with the snow around and between them. I cut small pieces of the snow print and set them around the trees. Much of this was needle turn applique using a blind stitch. I also had to overlay and applique trees over the the top of others to cover parts of the wolves and the holes cut to remove the wolves. I enlarged the mountain from the pattern I used in block 14.
Below is 14 and 15 put together. I found the cloud print looking for something else, and it seemed a better match than what I used earlier, so I took the old clouds off and added these. I do like them better.

And here is all 15 blocks put together. It makes quite a picture.
It measures about 60 X 80. I hope to get the borders on tomorrow.

Sunday, January 22, 2012

Pam's Wood Mystery rules 11,, 12 and 13

I am finally getting caught up. I only have two rules to go.
This is rule 11. I put two little heart shaped yoyo's at the bottom of two trees.
Rule 12 was the buggy barn technique and put words somewhere. I thought I would just put the name of my mystery in there.
Rule 13 was three tones of the same color. The only thing I could think of was to use the strip technique.
Rules 11 thru 13.
Rules 1 thru 13 - only 2 more to go!

Tuesday, January 17, 2012

Rule 14 & 15 - finished!

I ended up combining Rules 14 and 15 because of time constraints with student teaching starting soon (and the fact that I was behind on #14....lol). I haven't got a clue why the pic is sideways, but that's beside the point. The piano key border is one of my favorite things to use in bordering a quilt and there's no pink in the entire quilt. =) The hearts in the corners of the border are what remained of the teddy bear panel. I do admit to machine applique'ing them on because I didn't have time to do them otherwise. The only thing that didn't get in from Rule 14 was the pinwheel and that's because I could think of how to add one.

I'm not real happy with all the open background fabric in the bottom right, so I may end up adding something else there. But haven't decided on that.

I've had a great time working on the mystery this past year. It's been great fun to watch as everyone's quilt has unfolded. And if another one is done I'd love to take part again!

Saturday, January 14, 2012

Rule Release #15 - THE LAST ONE!

Rule Release #15

Hello again everyone! 

Wow!  We are actually releasing the last rule right behind our year mark.  I really did not expect to have a queen sized top this far done one year out.  This is wonderful!

Rule: "No Pink." 

The lady who submitted this rule always uses pink and wanted  to be forced against it.  Now, doesn't that sound like a simple rule to finish off with?  It is simple for me because I don't really like pink.

Technique:  Choose any technique you favor.   Perhaps there is one you tried this year that you wish to repeat.

Size:  We are going to complete the row we began in December.  This row completion, once sewn to the TOP or BOTTOM of your quilt, will complete the quilt top -- yay!  (minus borders).  Block #15 will need to be 30 1/2" wide ( 30" finished) by 22 1/2" tall (22 finished). 

Once this row is completed in February, the quilt should measure 60 x 80 which will fit the top of a queen-sized bed.  You will have to make borders to get the quilt long enough to go over the sides of the bed.

Due Date: I think the "quilt top" without borders should be due Feb 29, 2012 -- LEAP DAY.  I mean, we only have a due date such as this every four years, right.   It will also allow us catcher-uppers to catch up.

Thank you and enjoy.

Scarecrow, rule 13

I Used 3 shades of blue to frame a theme pieced of fabric.
Added  the crow fabric under it so the block would be the right size.  

Wednesday, January 4, 2012

Scarecrow rule 12

For the "buggy barn" technique I made the trees.  Those were fun.  So fun in fact that I decided to make a scarecrow Santa.  That may have been easier if I were making a BIGGER one.  But once I had a good start on this I continued even though the pieces were tiny to work with.   His face is pink and hard to see with the white bg.  I am going to put more details on the face and a pompom or button on the tip of his cap.
For the "words" part of the clue, as you can see,  I used fabrics with words.  The crow fabric has a sign that says, "When this you see, remember me" .  I have been putting words here and there throughout the quilt already.   So I thought fabrics with words would be fine here.  
I really do love this project and I am sorry to have fallen behind.  I hope to get up to date here pretty soon.

Monday, January 2, 2012

9 and 10 done - The Quilted Barn

I am finding some time to catch up -- yippee!  I am only three behind now.

The first row was added to the bottom of the quilt.  Different sized blocks that fit together are in the barn section while the orange flowers are 3D.

The very bottom row has the folded insert technique.  I did it very simple by folding the green strip of fabric on the bottom right and catching the edges in the seam.  I appliqued the fold down.  The disappearing 9 patch is in the front of the lower red barn.  I sewed the disappearing pieces together at random with no specific rhyme or reason.

Now I am off to making a bridge and horse/buggy to begin my column.

Oh, I finally got all of my itty bitty flowers attached to the fence between the two big trees.  They are a bit busy, but I like it.

I also added three small trees below the "falling apart" old barn on the left.
Below is a close up of the two newest rows.

Below are closeups of the flowers.  The whole flower section was made by putting fusible webbing on the back side of the fabric, fusing it to itself, and then cutting out the flowers.  The front and back of the flowers are the same fabric.  Most were attached with a French knot, but some I used invisible thread.

Sunday, January 1, 2012

Lyn's Small Town Winter is current to Rule 14.

Here is Lyn's Rule #14.  She is busily working on rule 15 and will have it done on time on January 15th as scheduled.